
I am so excited to share with you a fun little project I created using Woof Woof meow which will be in stores November 1. This blog post as well as videos that I made with The Fat
Quarter Shop will help you make these little cuties.

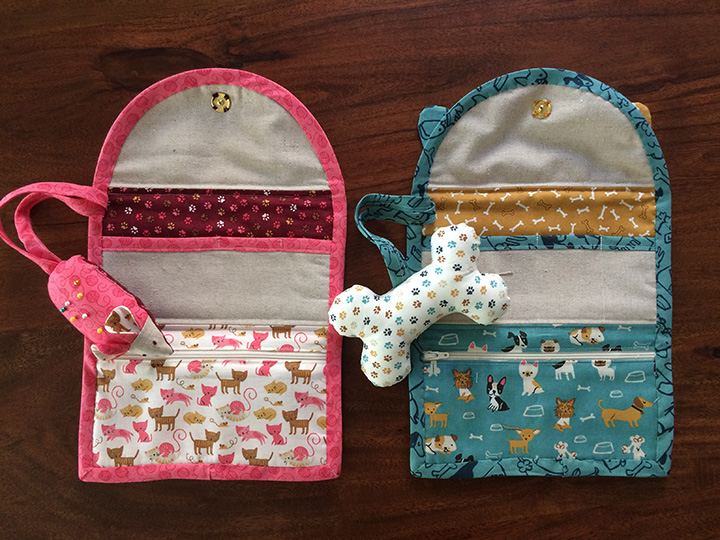


Click on the link to the PDF Pattern and templates for the Kitty Caddy and Puppy Pouch HERE. I hope you have as much fun making them as I did!
*Note: all seams are 1/4” unless otherwise stated.
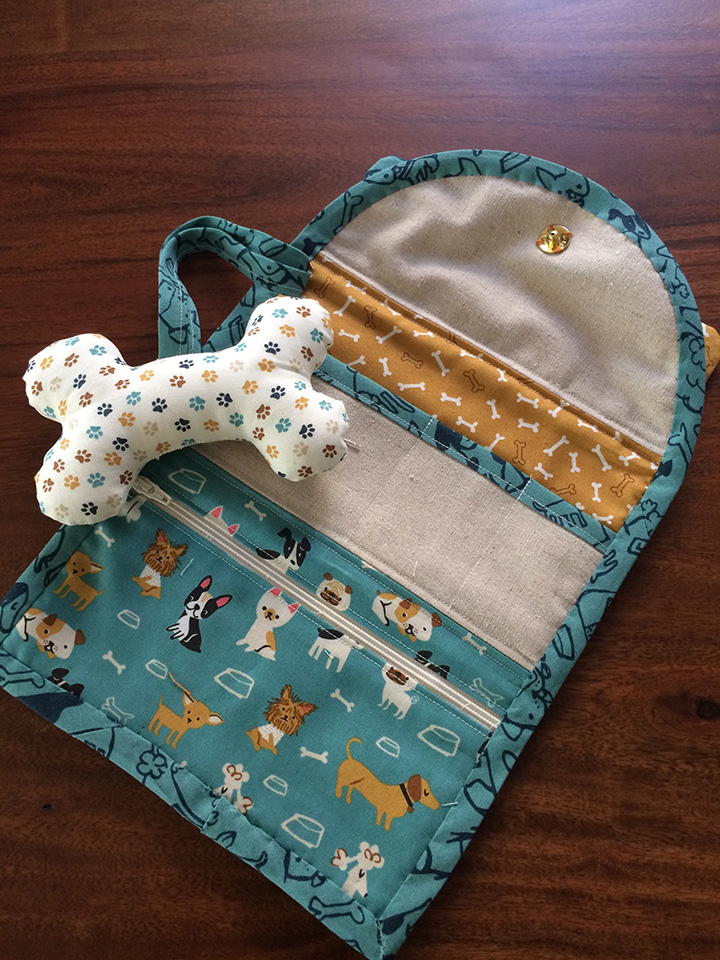
**Note: use same instructions for puppy pouch using templates for puppy face, ears and bone pincushion


*Note: all seams are 1/4” unless otherwise stated.
**Note: use same instructions for puppy pouch using templates for puppy face, ears and bone pincusion
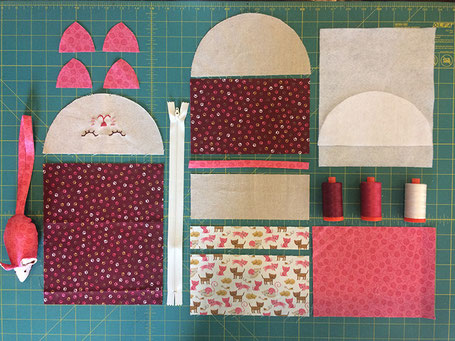
INTERIOR PANEL
ZIPPER COMPARTMENT
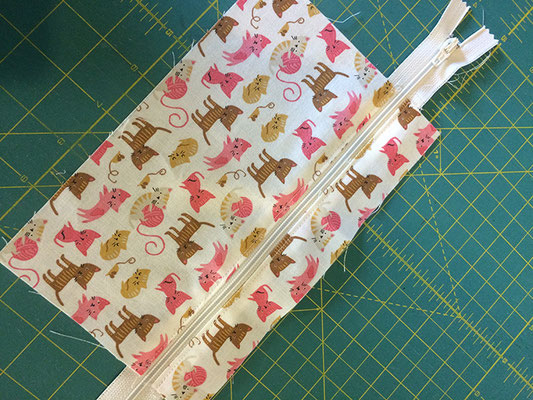
1. With the zipper pull at the top, place long edge of piece M on Left side of zipper, right side facing right side of zipper. (NOTE: The zipper is longer than
the fabric intentionally. the fabric should be centered in the length of the zipper with the zipper-pull out of the way). Use binding clips or pins to hold
in place. Install the zipper foot and move the the needle to the edge. Stitch next to the zipper teeth on the left side along the entire length of fabric.
2. Fold fabric over and press fabric away from zipper.
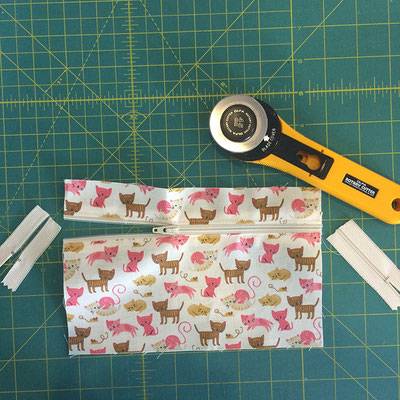
3. Again with the zipper pull at the top, place long edge of piece L on right side of zipper, right side facing right side of zipper. Use binding clips or pins
to hold in place. Move the the needle to the edge. Stitch next to the zipper teeth on the left side along the entire length of fabric
4. Fold fabric over and press fabric away from zipper.
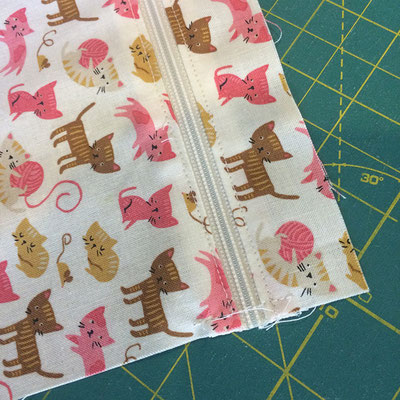
5. Top stitch along pressed seam on both sides of zipper.

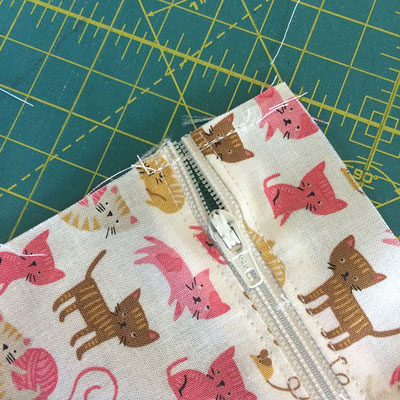
6. Pull zipper tab to center of compartment. Clip excess zipper on each side. Make a small stitch on each end of zipper so that the zipper does not come apart.
7. Place piece N behind zipper compartment, right side facing wrong side of zipper compartment front. If necessary, trim excess fabric from piece N to fit the zipper compartment. This will be your lining. Using the longest stitch length on your sewing machine, baste top edge together to hold in place.


MIDDLE POCKET COMPARTMENT
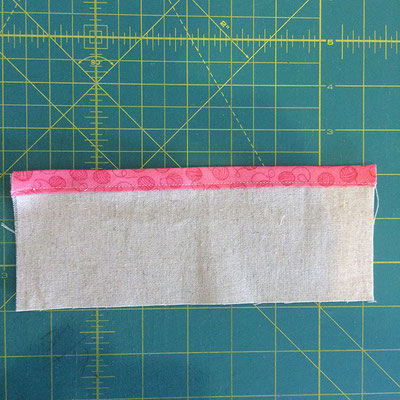
1. You will need 1” bias tape folded(when folded it will be 1/2”) for the edge of pocket K. See The Fat Quarter Shop video on how to make BIAS TAPE.
2. Cut a piece of 1” bias tape folded, 8” long.
3. Place folded bias tape between top long edge of piece K and top stitch along bottom edge of bias tape to create a trim for your pocket.
4. To create the pocket, mark a line from top to bottom of K at the half way point (4”) and then at 6 ” with a washable fabric pen. You can also customize your pockets to the size that works best
for you.
5. Put K on top of right side of J bottom edge and pin in place. Stitch down on lines of piece K with both pieces together to create pockets.

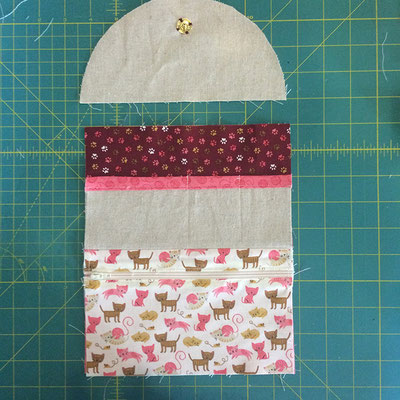
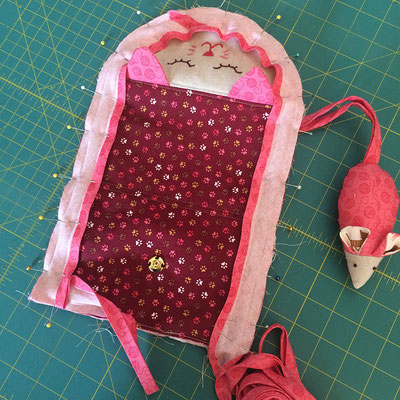
ASSEMBLY OF INTERIOR
1. Pin right sides together, top edge of zipper compartment and bottom edge of middle pocket compartment and sew together. Press open seams.
2. Pin right sides together, top edge of middle pocket to bottom straight edge of O(non kitty piece) and sew together. Press open seams.
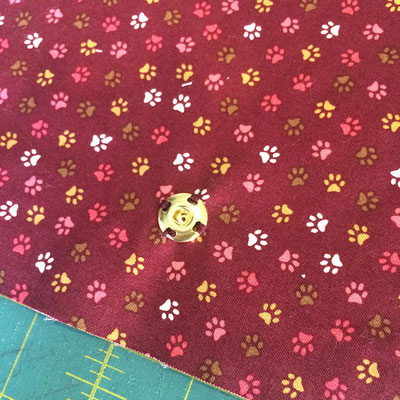
3. Hand sew snap or velcro 1” from top curved edge of piece O.
You have now created your interior panel. Now we will set this aside and work on the exterior panel.


EXTERIOR PANEL
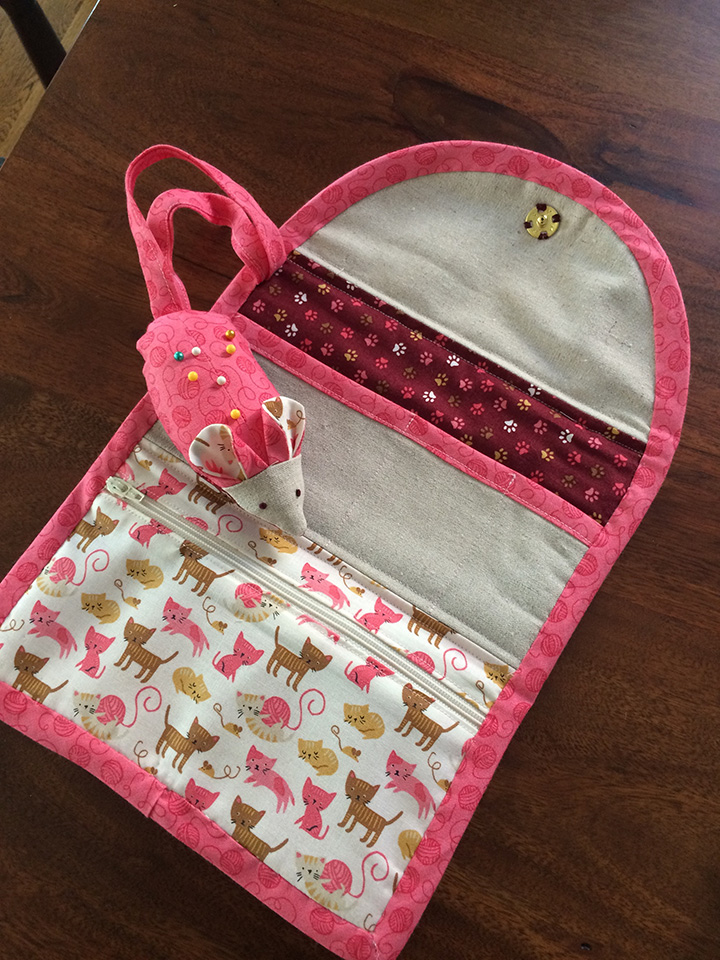
KITTY FACE
1. Using the Kitty Face template, embroider the kitty face onto the second O piece. To see how I embroidered the face and get some helpful tips, watch the video on The Fat Quarter Shop site on
how to EMBROIDER FACE OF KITTY CADDY.
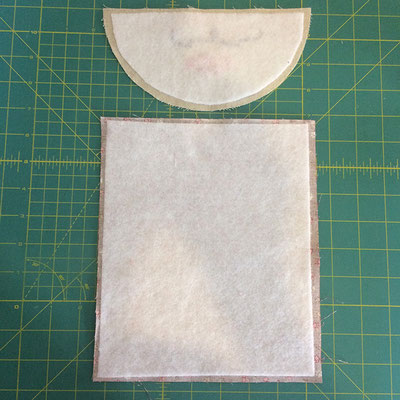
2. Once you have finished embroidering the face, using the interfacing instructions, put piece Q on the wrong side of piece O and fuse.
KITTY EARS
1. Place right sides together of G and sew around ear leaving bottom straight edge open.
2. Cut excess fabric. Turn inside out and press.
3. Repeat steps 1-2 for H pieces.
BACK PANEL
1. Use the interfacing instructions to put the fusible interfacing (piece I) on the back of piece P.
ASSEMBLY OF EXTERIOR
1. Place kitty (piece O) and ears to straight edge, right side of kitty face 1” from both edges.
2. Place short edge of P on top of Q and ears right sides together and sew together. Press open with an iron.
3. Hand sew other side of the snap to the bottom of piece P 2 ” from bottom.


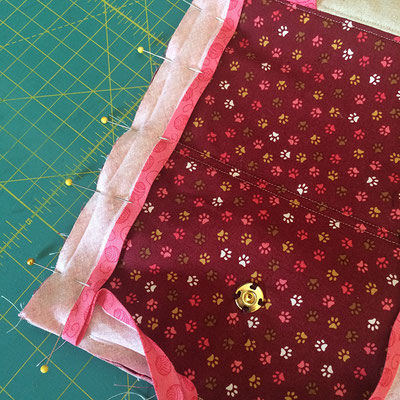
ASSEMBLY OF KITTY CADDY
1. Place interior and exterior pieces wrong sides together matching seams and pin in place.
2. Top stitch above and below each matching seam (NOTE: Remember not to top stitch over the kitty ears. You will have to move them after you top stitch one
side).
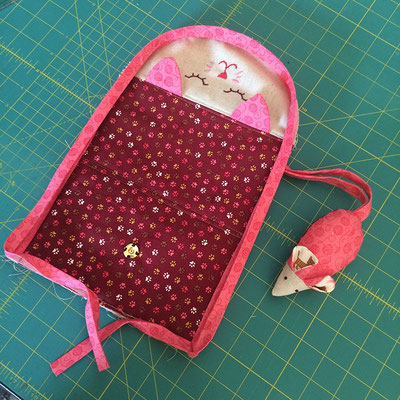
3. Place your pincushion mouse tail on the left edge of your interior pocket section. See the video on how to make a MOUSE PINCUSHION on The Fat Quarter Shop.
4. Using the longest stitch on your sewing machine, sew around entire kitty caddy to keep everything in place.
5. Use the remaining bias tape you made to bind the kitty caddy. Unfold the bias tape and pin along the exterior panel edge leaving some excess bias tape to
finish binding.
6. Sew around entire kitty caddy leaving about 2” not sewn. Using the excess bias tape match right sides together and sew together so that it fits the length of
the un sewn portion of the binding. Clip excess bias tape. Pin down flat on the un sewn bias tape on the exterior side and sew down to close off binding.
7. Fold the bias tape up and over to the interior and stitch in place by hand or machine, mitering the corners.


Write a comment
Jean (Wednesday, 29 November 2017 11:39)
These are so cute. Thanks for sharing.
Robin in Washington State (Wednesday, 29 November 2017 13:21)
These are just too stinkin cute, thanks for sharing.
Dottie (Wednesday, 29 November 2017 14:11)
Oh my goodness! What an adorable pattern! Thank you so much. This is wonderful. VBG
Debbie (Wednesday, 29 November 2017 14:23)
SO cute! The pattern, the fabric...AND the pincushions...SO creative! Thank you for sharing!
Rosemary (Wednesday, 29 November 2017 14:47)
Oh my goodness ... that is beyond adorable!! Not only the pattern but the fabric ... Okay, time to buy more fabric. I don't care what anyone says. I need more fabric and, more importantly, I need THIS fabric. LOL Thank you for sharing ..
Alice G (Wednesday, 29 November 2017 17:56)
What a sweet pattern. Thank you for making it available for free. My granddaughter will love it.
Sincerely,
Alice G
Amy M. (Wednesday, 29 November 2017 20:04)
Absolutely adorable! � Thanks for sharing :)
Joyce (Saturday, 02 December 2017 11:21)
It's So Sweeeet!!
Royce (Wednesday, 07 February 2018 12:56)
These are too cute. Thanks so much for sharing.
Anne (Thursday, 10 January 2019 12:07)
I am trying to cut for #33 and having trouble with the triangles. Why are there no letters in the diagrams any more? It is very confusing! And extremely frustrating! Do you have a simplified diagram (with letters) that is online that I can follow?
Abby (Friday, 13 January 2023 02:14)
Greetings, it seems that de link to the Google Drive page where the PDF was stored has gone bad, it no longer seems to exist. Could you please share where we can now find the PDF please? Thank you so much!
Vicki (Saturday, 14 January 2023 11:07)
Could you please share where we can now find the PDF? Please!! thank you so much. They are so cute.
Nancy (Tuesday, 24 January 2023 11:12)
This Woof Woof and Kitty are so cute. Where can we currently find the pattern. It is no longer on Google Drive.
Thank you so much.
MARTHA LUCIA FADUL MELO (Thursday, 02 March 2023 17:24)
que linda cosas
Lainee Reed (Thursday, 19 December 2024 08:50)
Link leads to an error message stating that it no longer exists :( I really want to make these! So sad!